
How to Calculate How Much Flooring You Need
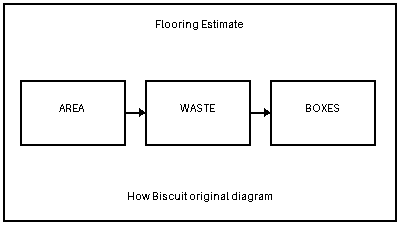
Calculate net floor area, add the waste percentage appropriate to the material and layout, divide by square feet per box, and round up. Keep unopened returnable boxes and retain spare material for future repairs.
What to know
- Waste depends on layout, material, room shape, and installer skill.
- Box coverage, not plank dimensions alone, controls the final purchase quantity.
- Old flooring can contain asbestos, so quantity planning does not replace safe material assessment.
Flooring is sold in whole boxes, cartons, rolls, or pieces, while rooms rarely divide into those packages neatly. A reliable estimate therefore has four parts:
- Measure the actual floor area.
- Add waste for cuts, defects, layout, and future repair.
- Divide by the coverage in one package.
- Round up to a whole package.
The basic formula is:
Boxes needed = room area × (1 + waste percentage) ÷ square feet per box
Always round the final result up.
Step 1: Divide the space into simple shapes
For a rectangle:
Area = length × width
A 12-by-10-foot room has 120 square feet.
For an L-shaped room, split it into two rectangles, calculate each area, and add them. Measure closets, alcoves, bay areas, and connected hallways separately.
For a triangle:
Area = base × height ÷ 2
Use the longest practical measurements and record them immediately. Measure at more than one point in rooms with walls that are not square.
Step 2: Decide what not to include
Do not subtract every cabinet toe-kick or tiny obstruction. The saved quantity may disappear into cuts and waste.
Usually exclude permanent areas that will definitely never receive flooring, such as a fixed island installed before the floor, but follow the installation plan. Floating floors may have restrictions about being trapped beneath cabinets or built-ins.
Calculate stairs, landings, wall tile, baseboard, underlayment, transitions, and trim separately.
Step 3: Choose a realistic waste allowance
Waste covers end cuts, damaged pieces, pattern alignment, color selection, mistakes, and future repairs.
A straight installation in a simple rectangular room may need less waste than a diagonal tile layout, herringbone pattern, irregular room, or natural material that requires sorting. Lowe’s tile calculator suggests purchasing an extra 10 percent for trim and waste, but that is an estimating convention, not a universal requirement for every flooring system. [1]
Use the flooring manufacturer’s guidance and the installer’s layout plan. Common planning ranges might be:
- Simple straight layout: about 5 to 10 percent
- Irregular rooms or more cuts: about 10 percent
- Diagonal or patterned layouts: often 10 to 15 percent or more
- Natural stone or material with heavy visual selection: project-specific
Do not use these ranges to override the product instructions.
Step 4: Divide by box coverage
Example:
- Net room area: 120 square feet
- Waste allowance: 10 percent
- Adjusted area: 120 × 1.10 = 132 square feet
- Coverage per box: 22.5 square feet
- Boxes: 132 ÷ 22.5 = 5.87
Round up to 6 boxes.
Check the carton label. Two products with similar plank dimensions can have different pieces per box and different coverage.
Multiple rooms
Calculate each room separately before combining them. This helps reveal where cuts may transfer from one area to another and where transitions change the layout.
Example:
- Bedroom: 132 square feet after waste
- Closet: 22 square feet after waste
- Hall: 48 square feet after waste
- Total: 202 square feet
- Box coverage: 23.8 square feet
- 202 ÷ 23.8 = 8.49
- Buy 9 boxes
If rooms use different directions, patterns, or dye lots, separate estimates may be safer.
Buy from the same lot when appearance matters
Wood, tile, vinyl, laminate, and natural stone can vary by production run. Check shade, caliber, lot, or batch markings. Mix material from several boxes during installation when the manufacturer recommends it, so minor variation is distributed rather than concentrated.
Keep at least some spare material for future repairs, especially if the design may be discontinued. Store it flat and dry as appropriate for the product.
Do not forget related materials
The flooring quantity is only one part of the job. Depending on the system, you may also need:
- Underlayment or vapor retarder
- Adhesive, mortar, or fasteners
- Grout and sealant
- Leveling or patching compound
- Moisture testing
- Expansion spacers
- Transitions and reducers
- Baseboard or quarter-round
- Stair nosing
- Delivery and acclimation space
Each has its own coverage calculation.
Safety when removing old flooring
Do not start demolition based only on a square-foot estimate. EPA says you cannot determine whether old floor tile or another material contains asbestos by appearance alone. If suspect material may be disturbed, EPA recommends evaluation and sampling by a properly trained and accredited asbestos professional. [2]
This is especially relevant in older buildings with resilient tile, sheet flooring, adhesive, or underlayment of uncertain age. Sanding, grinding, sawing, or breaking suspect material can release fibers.
Common estimating mistakes
- Buying exactly the measured area with no waste
- Forgetting closets and alcoves
- Using plank face dimensions but ignoring pieces per box
- Rounding down
- Assuming every box has identical lot markings
- Ignoring pattern repeats or diagonal cuts
- Failing to reserve repair material
- Measuring wall-to-wall once in an out-of-square room
- Subtracting so many small obstacles that the estimate becomes falsely precise
Bottom line
Measure the net area, add a justified waste allowance, divide by the printed box coverage, and round up. Quantity math is straightforward; layout, lot variation, cuts, substrate condition, and safe removal of existing material are what turn a number into a workable project.
Limits and cautions
- The article provides estimating math, not installation-engineering advice.
- Manufacturer instructions and local conditions determine expansion gaps, substrate preparation, and acceptable waste.
- Patterned layouts and natural materials may require substantially more matching and sorting.
Source notes
- Tile Flooring CalculatorLowe's
- I'm remodeling my home. Do I need to be concerned about asbestos in the building materials?U.S. Environmental Protection Agency
See something wrong or out of date? Report a correction.